Electolysis
Method
Electrolysis a method that uses an electrical current to separate the ions in a molten solution or an aqueous solution. An aqueous solution means a substance dissolved in water, in these experiments this will be an ionic compound such as sodium chloride or copper sulfate.
Equipment:
- Power supply ideally a low voltage supply, but batteries can be used.
- Power cables x 2
- Crocodile clips x 2
- Electrodes of carbon (charcoal) or copper foil.
- 250 ml beaker.
- Solution of Copper sulfate or sodium chloride.
- Ignition tubes to collect and test gases produced
- Bunsen burner
- Wooden splints
- Blue litmus paper
- Safety mat
- Goggles
Safety: Do not touch the electrodes or place fingers in the solution whilst the electrical supply is turn on. Turn off to Touch. Always wear goggles. The beaker and solution can heat up during use, handle with care. Copper sulfate is harmful if swallowed.
Set-up:
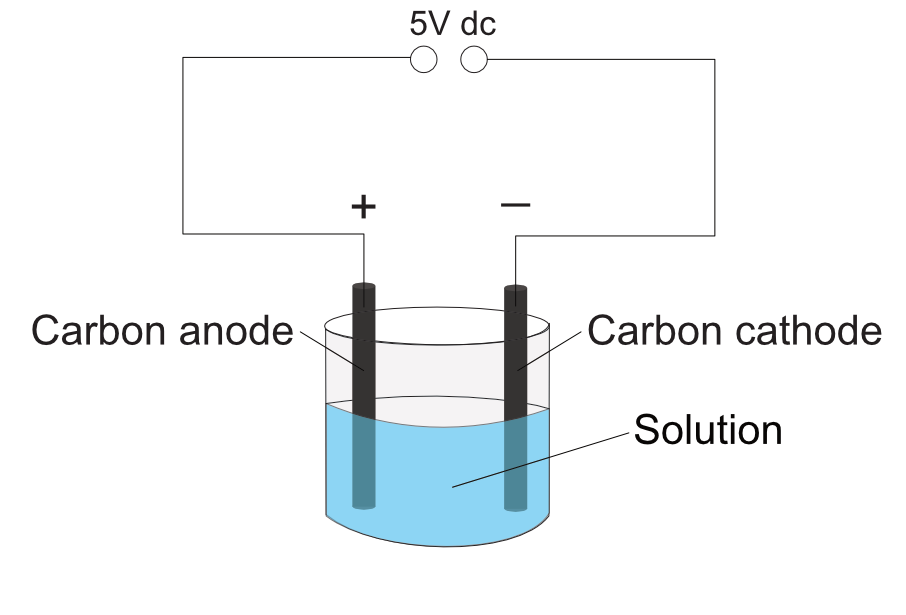
Set up the equipment as shown.
The power supply must be set to DC, not AC.
The set up can use carbon or copper electrode depending on the investigation. Use carbon electrodes are inert, copper electrodes are non-inert with copper sulfate solution.
To collect any gases produced at the electrodes first turn off the power supply. Completely fill an ignition tube with the same solution being tested. Invert the tube with a finger over the end and immerse the end into the solution. Holding the top of the glass tube, turn on the supply once the person’s fingers are out of the solution. Hold the open end near the electrode to collect a sample of the gas.
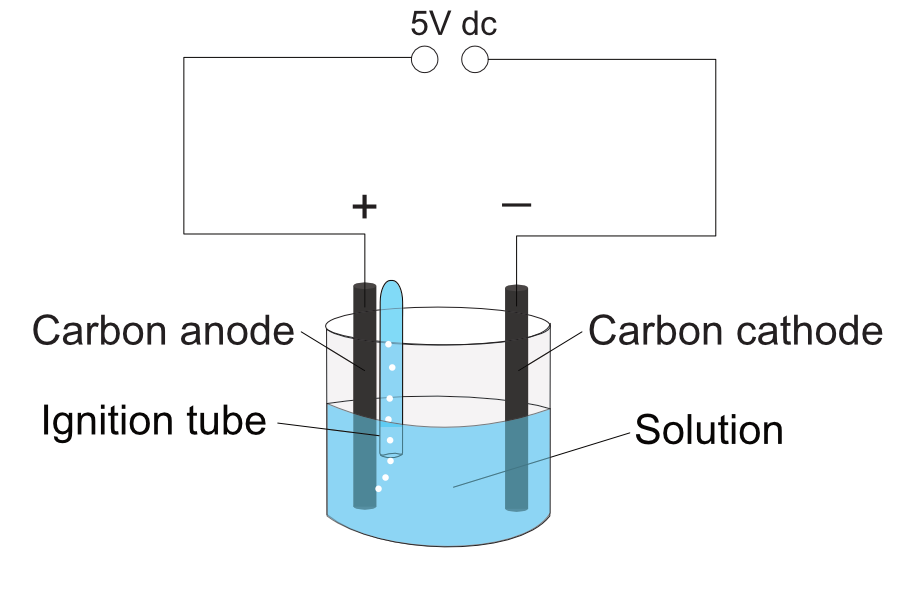
Remove the tube once full, keeping it inverted to prevent the gas from escaping. Then test the gas.
Observe any changes at both electrode, colour, gas bubbles, change in shape or size of the electrode.
Testing Gases
Safety: Always wear goggles, do not smell any of the gases, always use an ignition tube never use glass tubes. Keep tubes away from the source of flame, ie bunsen or matches etc.
Test for Oxygen: Place a glowing splint at the end of the ignition tube. If the gas is oxygen the glowing splint will relight.
Test for Hydrogen: Place a lite splint at the end of the ignition tube. If the gas is hydrogen the gas will ignite and produce a “popping” sound.
Caution: Always test for oxygen first. A lite splint placed near a tube of oxygen can cause a small explosion and shatter the tube.
Test for Chlorine: The gas may have a slight greenish colour. Place a damp piece of blue litmus paper into the tube. If the gas is chlorine the paper will turn red, then white as the chlorine will bleach the paper. Do NOT smell the gas it is toxic and can affect the breathing especially if asthmatic.