Constructing, Describing and Identifying Shapes
Constructing on Coordinate Axes
Transforming shapes is a key part of the higher GCSE.
You need to be able to rotate, reflect, translate and enlarge different shapes on a coordinate axis.
You will also need to know how to describe transformations.
The original shape that will be reflected is called the object. The result of a transformation of that shape is known as an image.
Rotating Shapes
In the exam you will be allowed some tracing paper and I would strongly recommend using it to help you with rotation.
Drawing Rotations
How to rotate a shape:
- Step 1: Draw the shape on your tracing paper
- Step 2: Place your pencil on the point of rotation
- Step 3: Rotate the shape the required amount
- Step 4: Draw the shape on the exam paper
Describing
When you describe a rotation you need to make sure you have included:
- The centre of rotation- this is a coordinate that you will rotate the shape from
- The direction of your rotation- clockwise or anti-clockwise
- The amount in degrees that you have rotated. This will usually by 45, 90, 180 or 270 degrees.
To find out the centre of rotation:
- Join two corresponding points- eg. a and a’ ( a’ is the rotated point that corresponds to the original point a)
- Find the perpendicular bisector of each line ( eg. a and a’ and the line b and b’) remember to make sure your compass is more than half way over each line.
- Where the perpendicular bisector cross will give you the point of rotation.
Reflecting Shapes
Drawing Reflections
When it comes to reflecting shapes you will need a mirror line or the line of reflection. This will be a straight line graph, eg. y=x y=4, x=2 or y=3x +2.
- Step 1: Draw the shape on your tracing paper
- Step 2: Place your pencil on the point of rotation
- Step 3: Rotate the shape the required amount
- Step 4: Draw the shape on the exam paper
Identifying Reflections
The key piece of information required for a reflection is the mirror line. This will be half way between the original shape and the reflected shape.
You will need to give the formula of the mirror line. To do this use the equation of a line y=mx+c
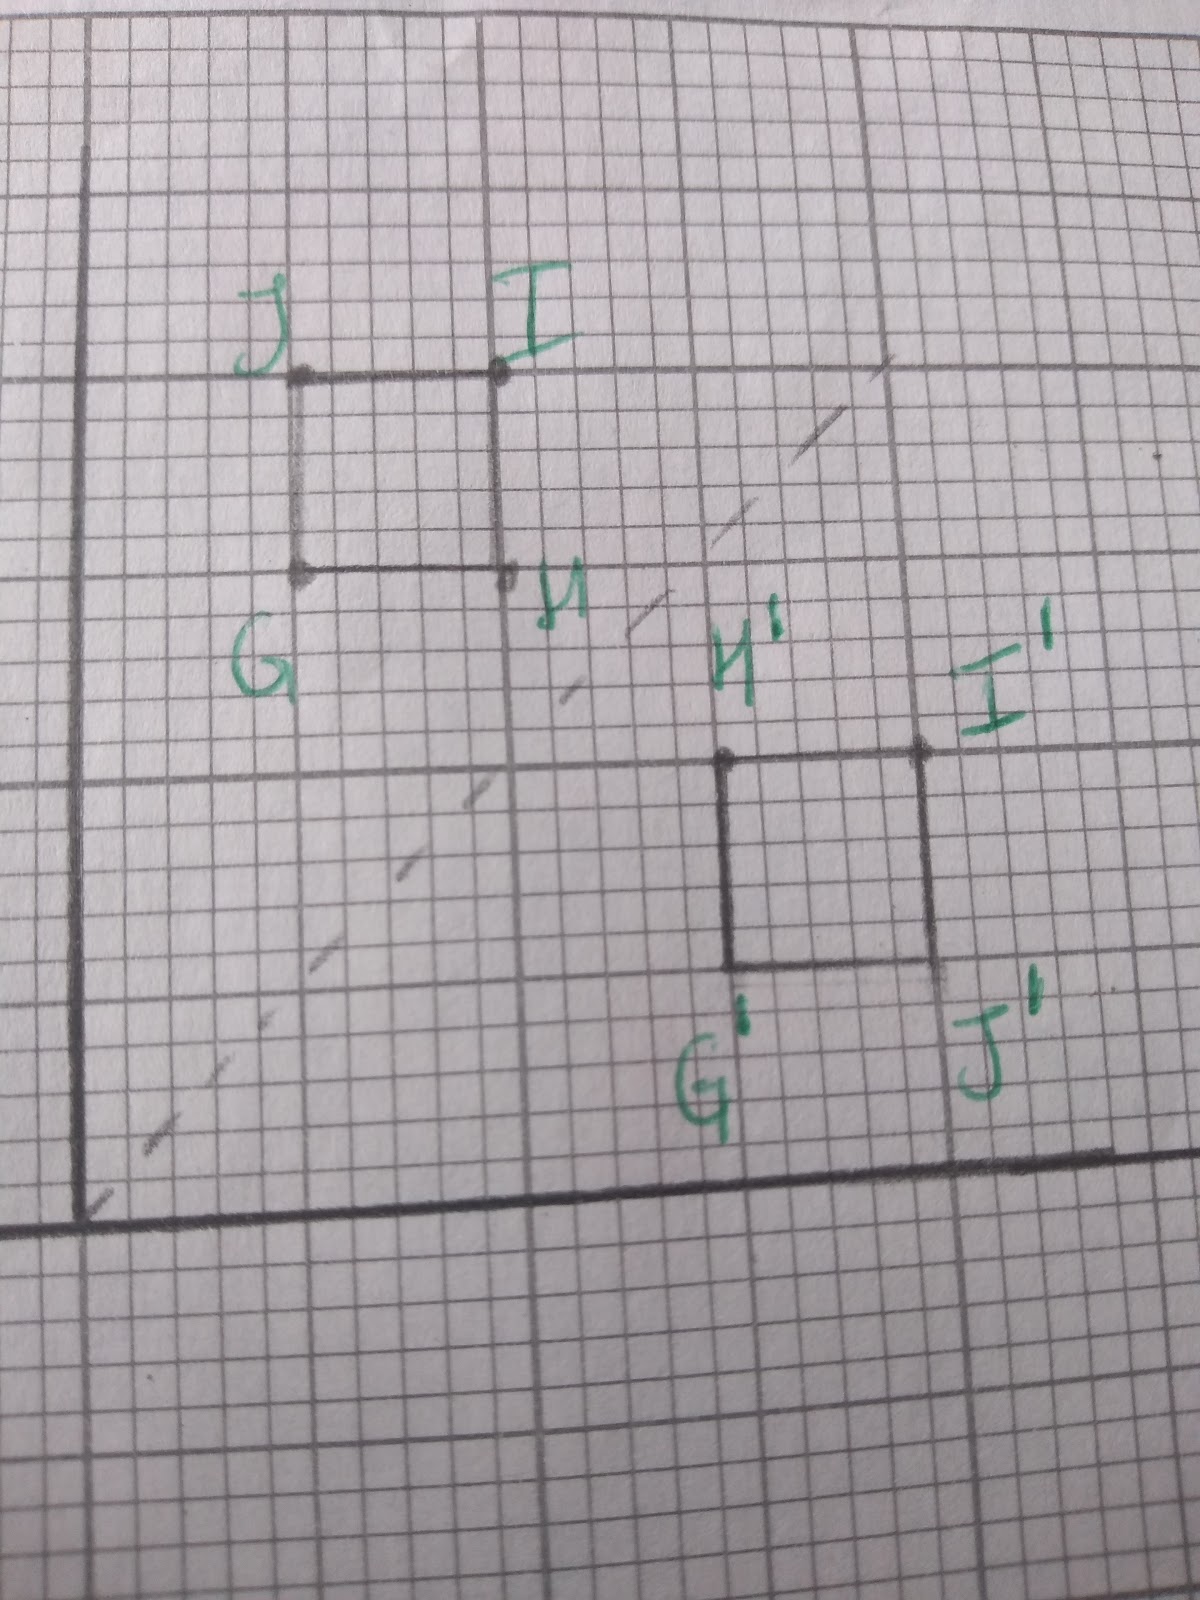
To describe this reflection we can saw Square GHIJ has been reflected in the mirror line of y=x
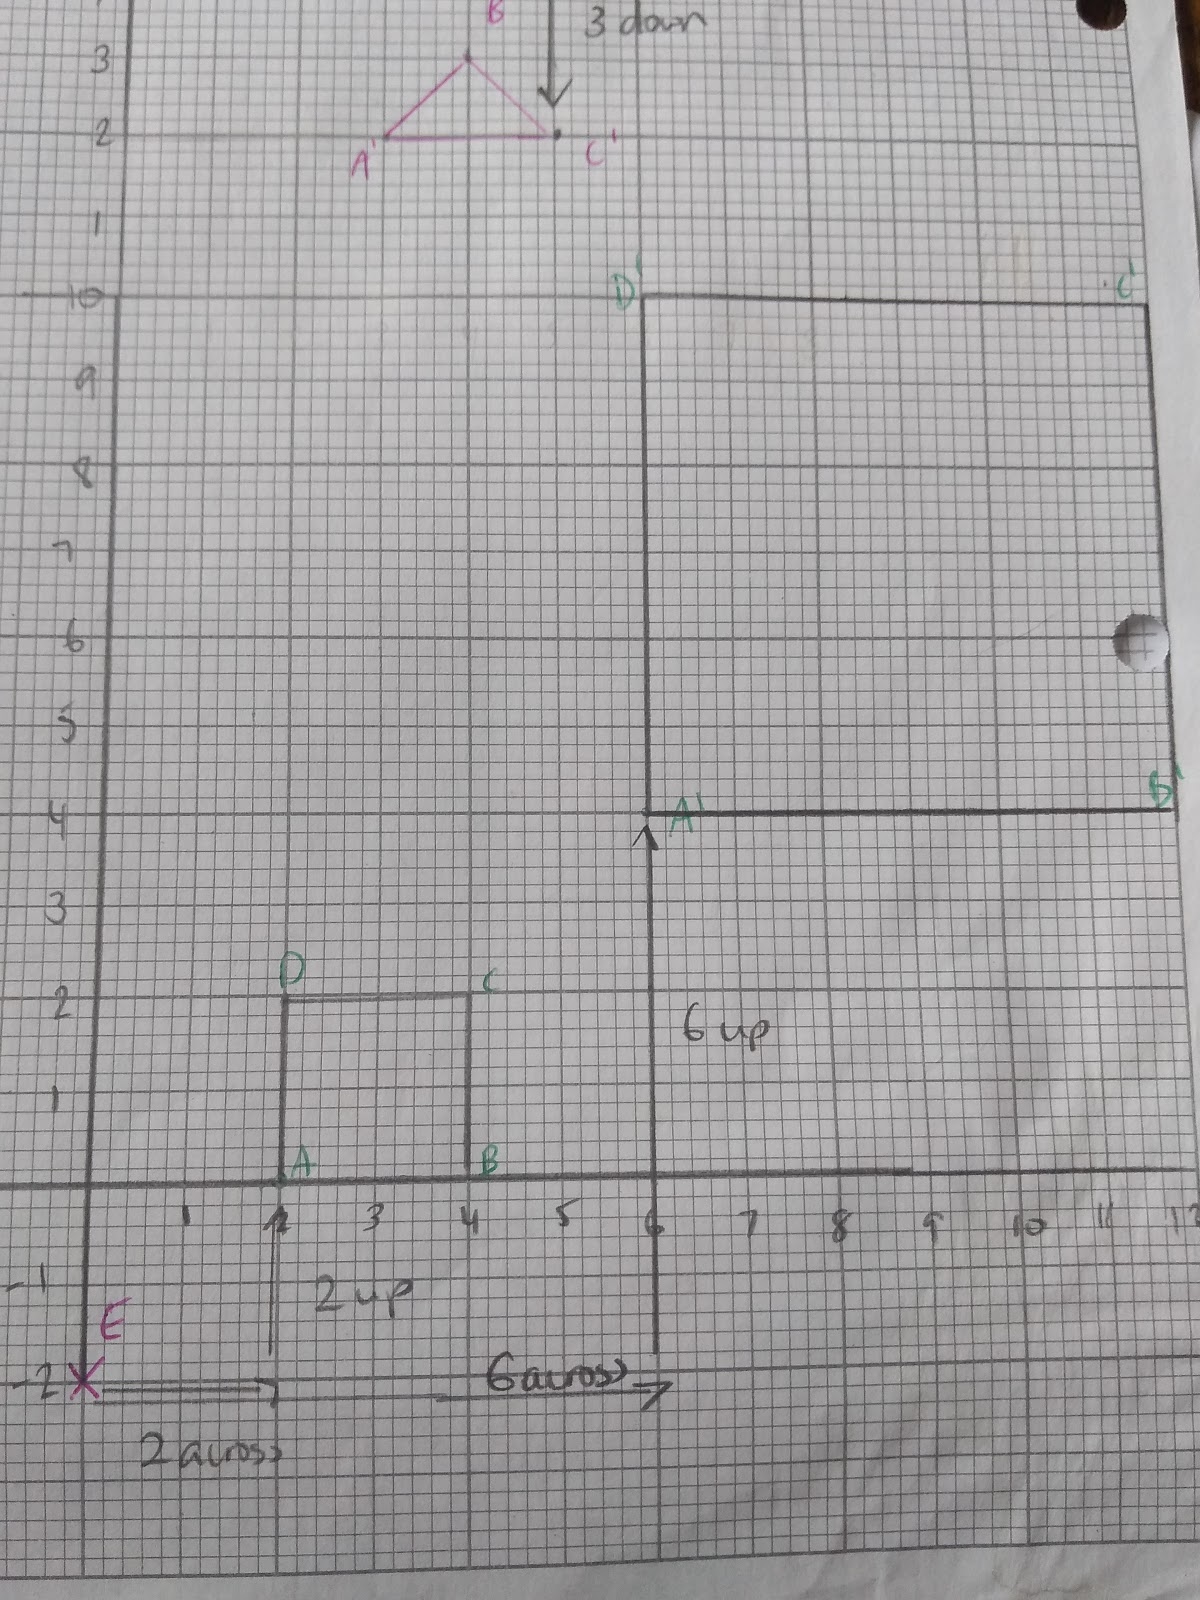
Translating Shapes
Translations describe the movement of shapes. We use vectors to describe translations.
The top number in the bracket refers to the movement along the x axis- right or left, and the bottom number describes the movement along the y axis- up or down.
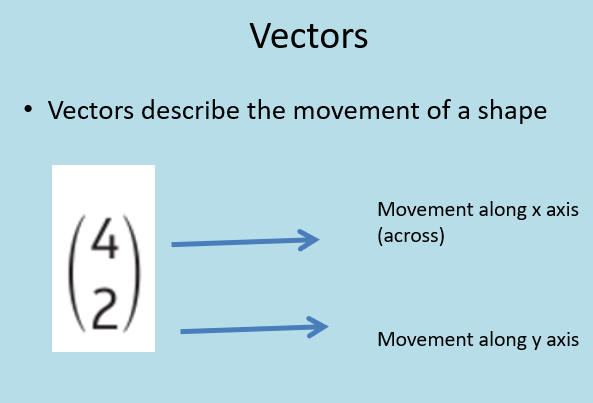
Positive numbers move a shape to the right (x axis) and up (y axis), negative numbers move a shape left (x axis) and down ( y axis).
Drawing a Translation:
- Step 1: Choose one point of the object.
- Step 2: Move that point as directed to by the vector
- Step 3: Repeat the process with the other points of the shape
- Step 4: Join the points and check that your image has exactly the same dimensions as the object.
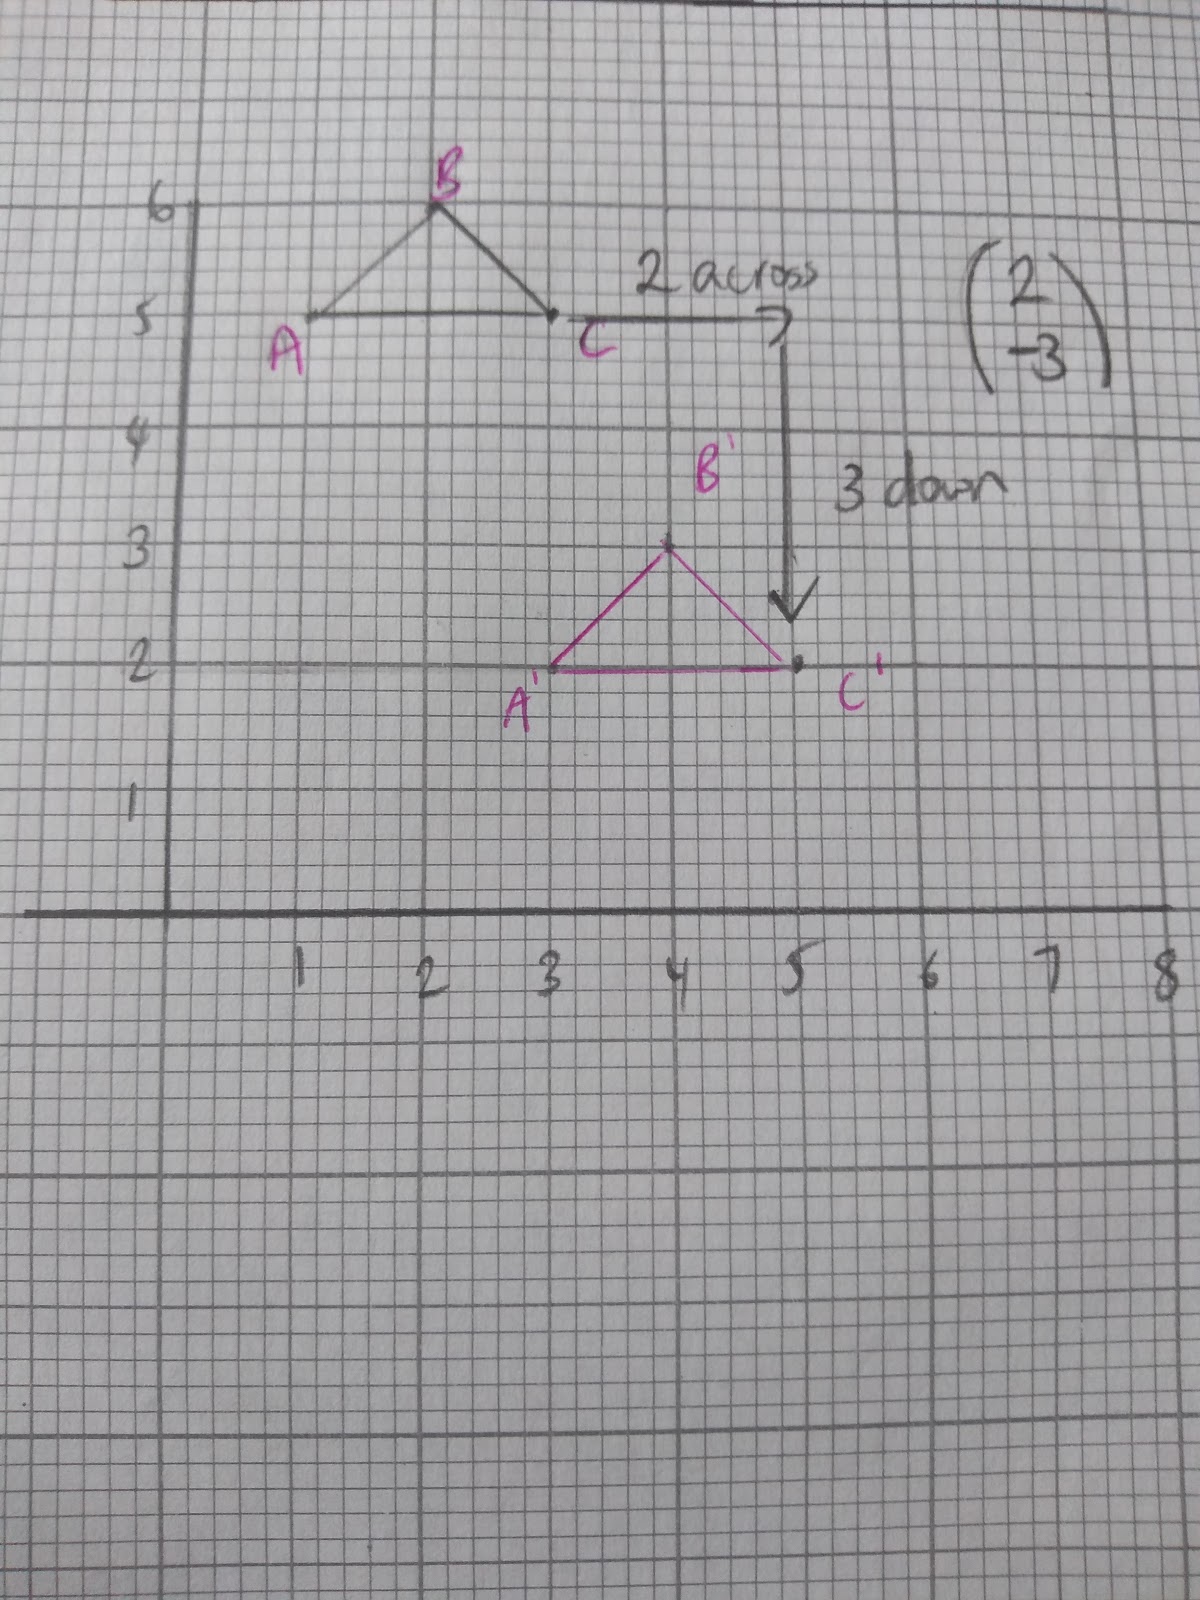
Describing a Translation:
To describe a translation we use vectors. Look at the movement on of the shape.
Eg.
Englargement
When we say enlargement we are really referring to a change in size of a shape. For enlargements can make a shape larger or smaller.
Two key parts to enlarging shapes:
- The scale factor of an enlargement dictates the change. You multiply each length by the scale factor.
- The point of enlargement. This is the point from which the shape will be enlarged. It is the change in distance from this point that define the position of the enlarged shape.
Drawing Enlargements:
- Step 1: Mark the point of enlargement on your graph
- Step 2: Find the distance from the point of enlargement to any point on your object, A in the example below.
- Step 3: Multiply this distance by the scale factor
- Step 4: Draw a new point at the given distance for the same point (A in the example) on the enlarged shape.
- Step 5: Repeat for all other points on your shape. Check that the length of the new shape corresponds to the scale factor of the object.
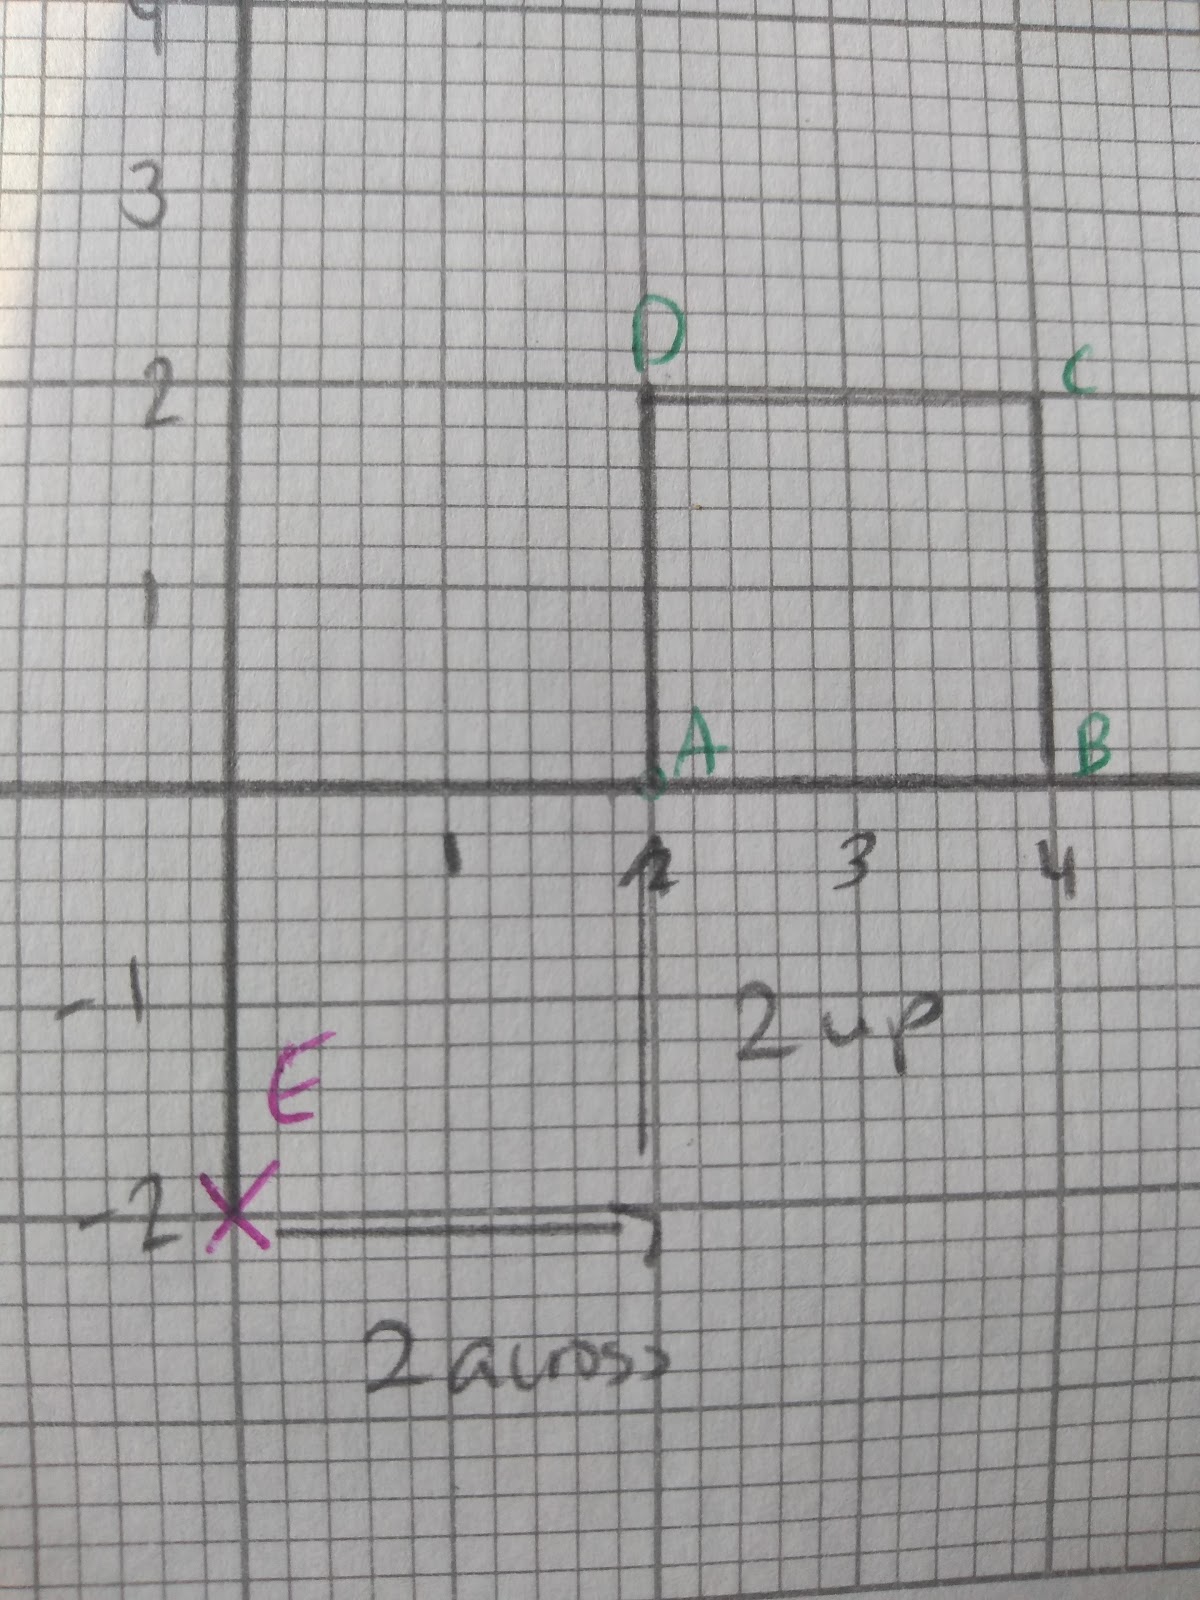
This shape will be enlarged from point E (0, -2) by a scale factor of 3.
As you can see, the distance from E, is currently 2 units to the right and 2 units up.
To enlarge this shape we will need to multiply this distance by 3.
As you can see the distance has tripled. The new points have been placed 3 times as far from the centre of enlargement as the smaller shape.
Describing Enlargements
When it comes to describing enlargements we need to know the scale factor and the centre of enlargement.
To find the scale factor divide the length of the image with that of the object.
In the example below you would divide 6 by 2 to get a scale factor of 3.
To find the centre of enlargement follow these steps:
- Step 1: Use a ruler connect the corresponding points of the image and the object. Eg. a and a’
- Step 2: Extend the lines until you reach the point where they cross
- Step 3: This is the centre of enlargement. Check that it is correct!

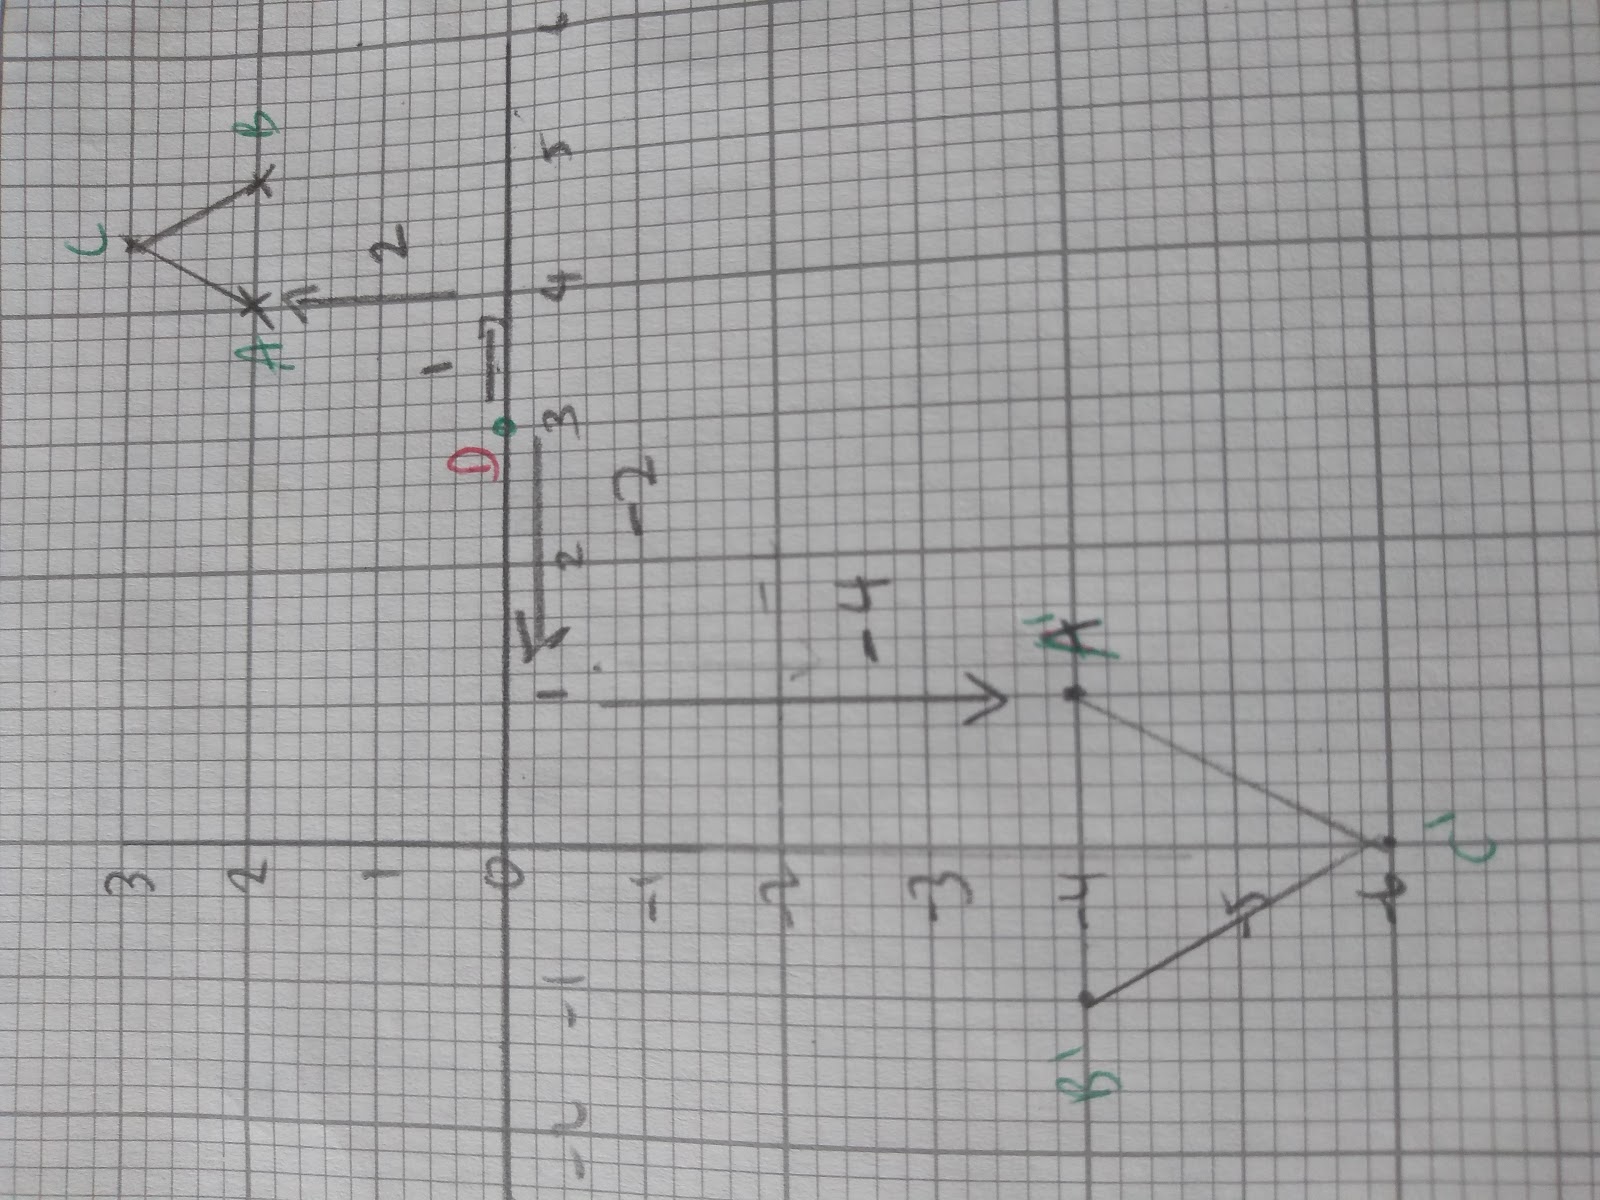
Negative Enlargements
When it comes to multiplying by a negative number the shape will not just change size but it will also change orientation. The same rules apply, but you need to think about what is happening to your coordinates. 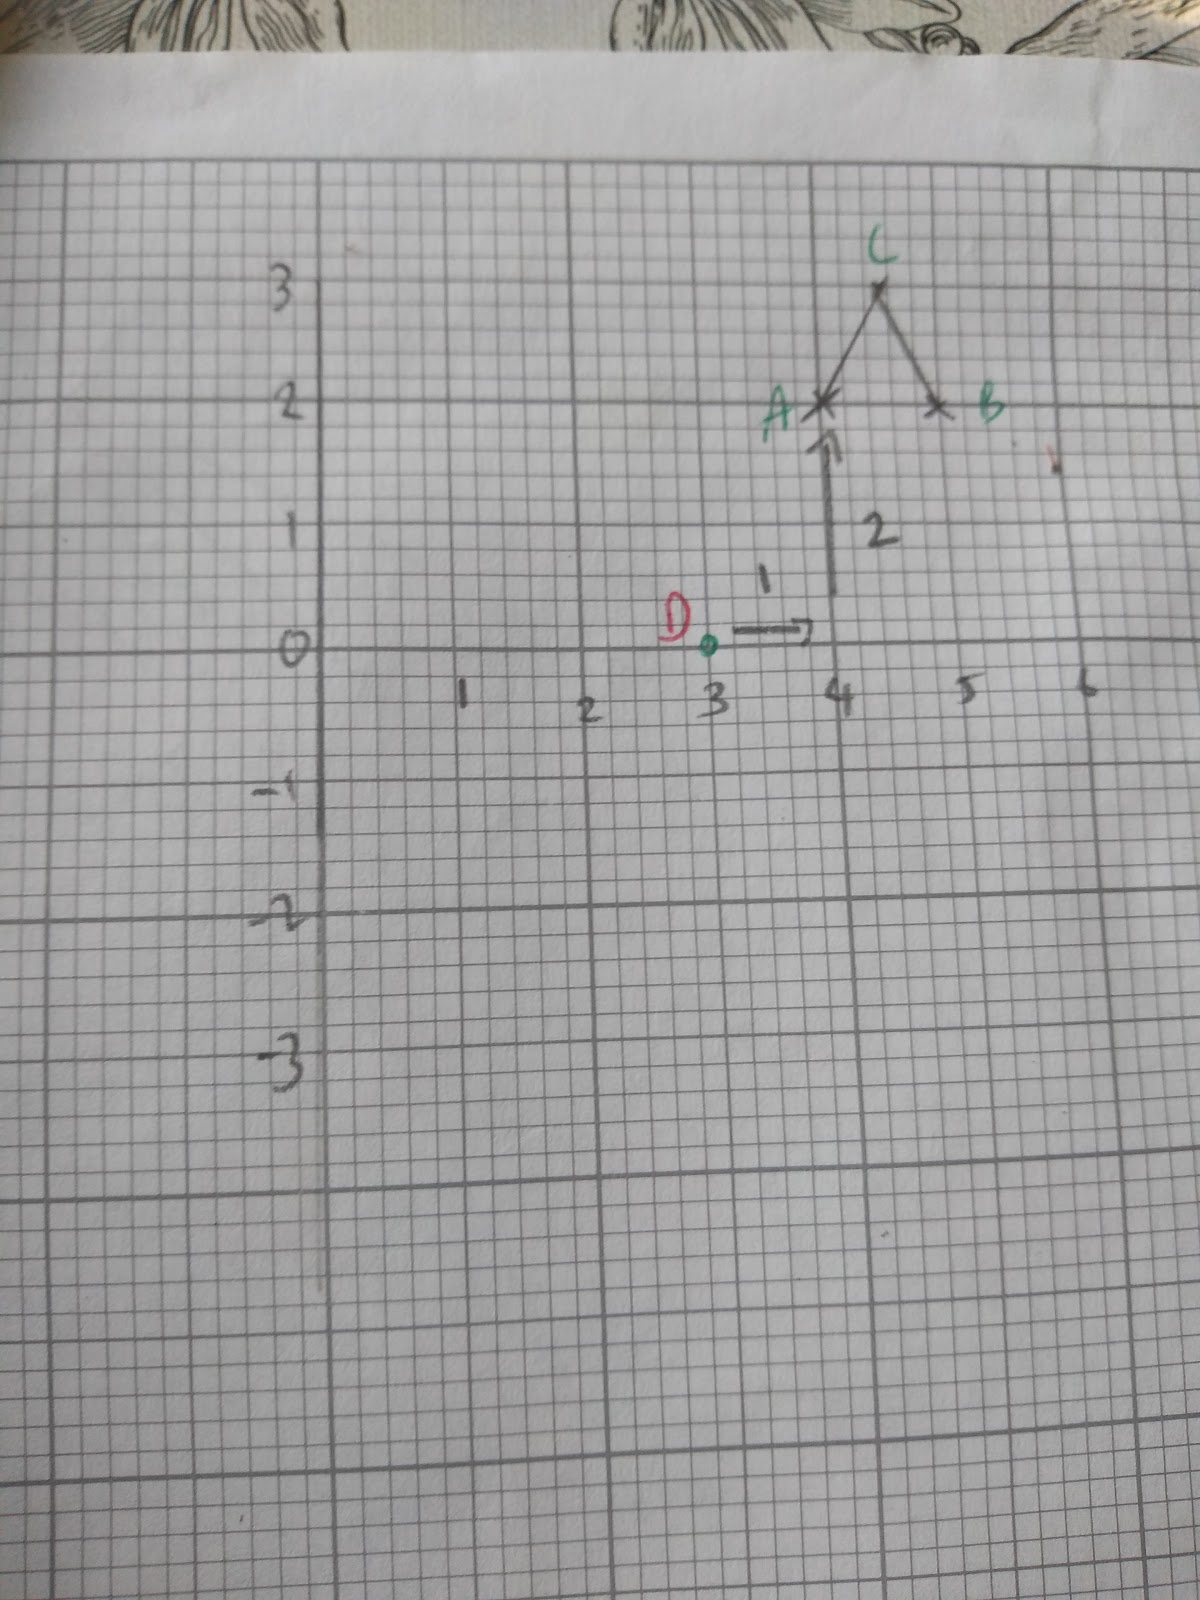
This shape will be enlarged by a scale factor of -2 at the centre of enlargement D (3,0).
Currently D is 1 unit to the right and 2 units up from point A
Therefore if we multiply these distances by -2 that will mean A’ (enlarged point A) will be - 2 units to the left and -4 units down from point D.
You may also come across fractional, negative enlargements. These will make the object smaller and change their orientation, but don’t worry, just follow the same steps as before!
For example, here ABCD has been enlarged by a scale factor of - ½ 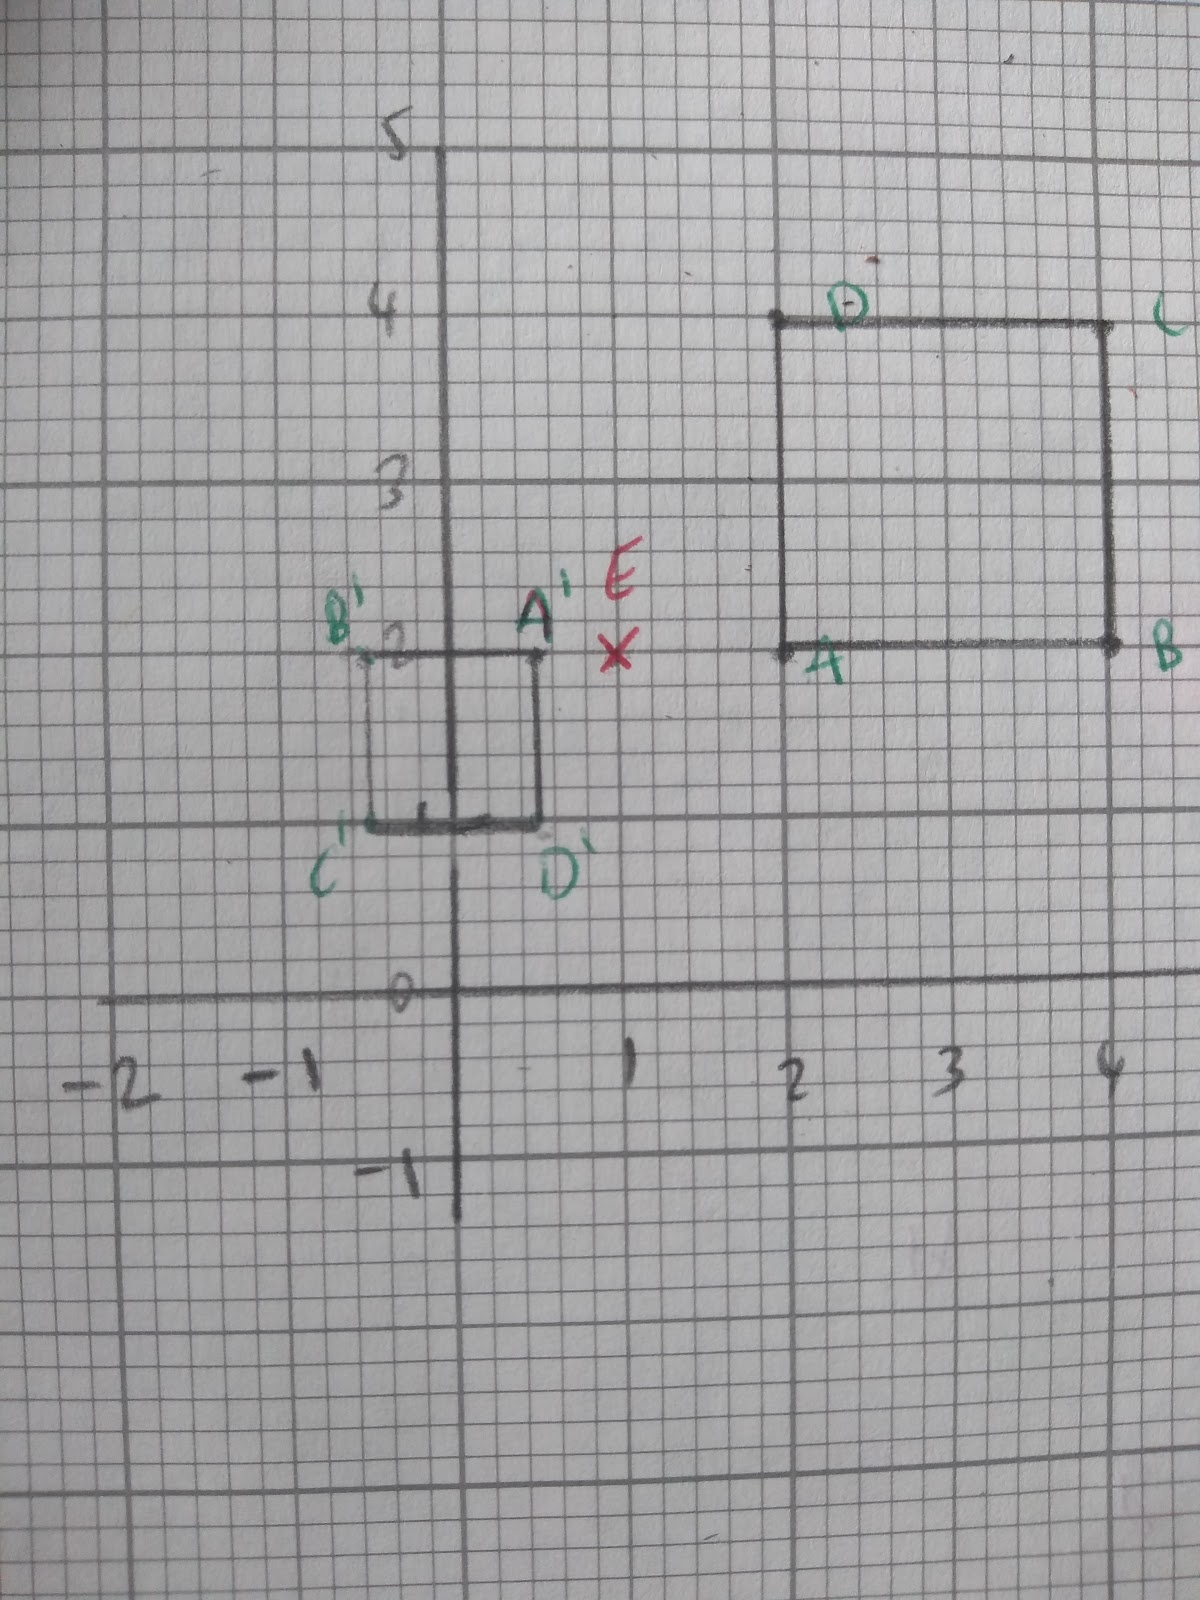
We use exactly the same steps as before eg.:
- Step 1: Mark the point of enlargement on your graph Point E has been marked.
- Step 2: Find the distance from the point of enlargement to any point on your object, A in the example below. The distance from E to A = 5 units
- Step 3: Multiply this distance by the scale factor 5 x -½ = -2.5 units from point E ( so it will move to the left)
- Step 4: Draw a new point at the given distance for the same point ( A in the example) on the enlarged shape.
- Step 5: Repeat for all other points on your shape. Check that the length of the new shape corresponds to the scale factor of the object.
Combining Transformations
Sometimes two transformations can combine to create another.
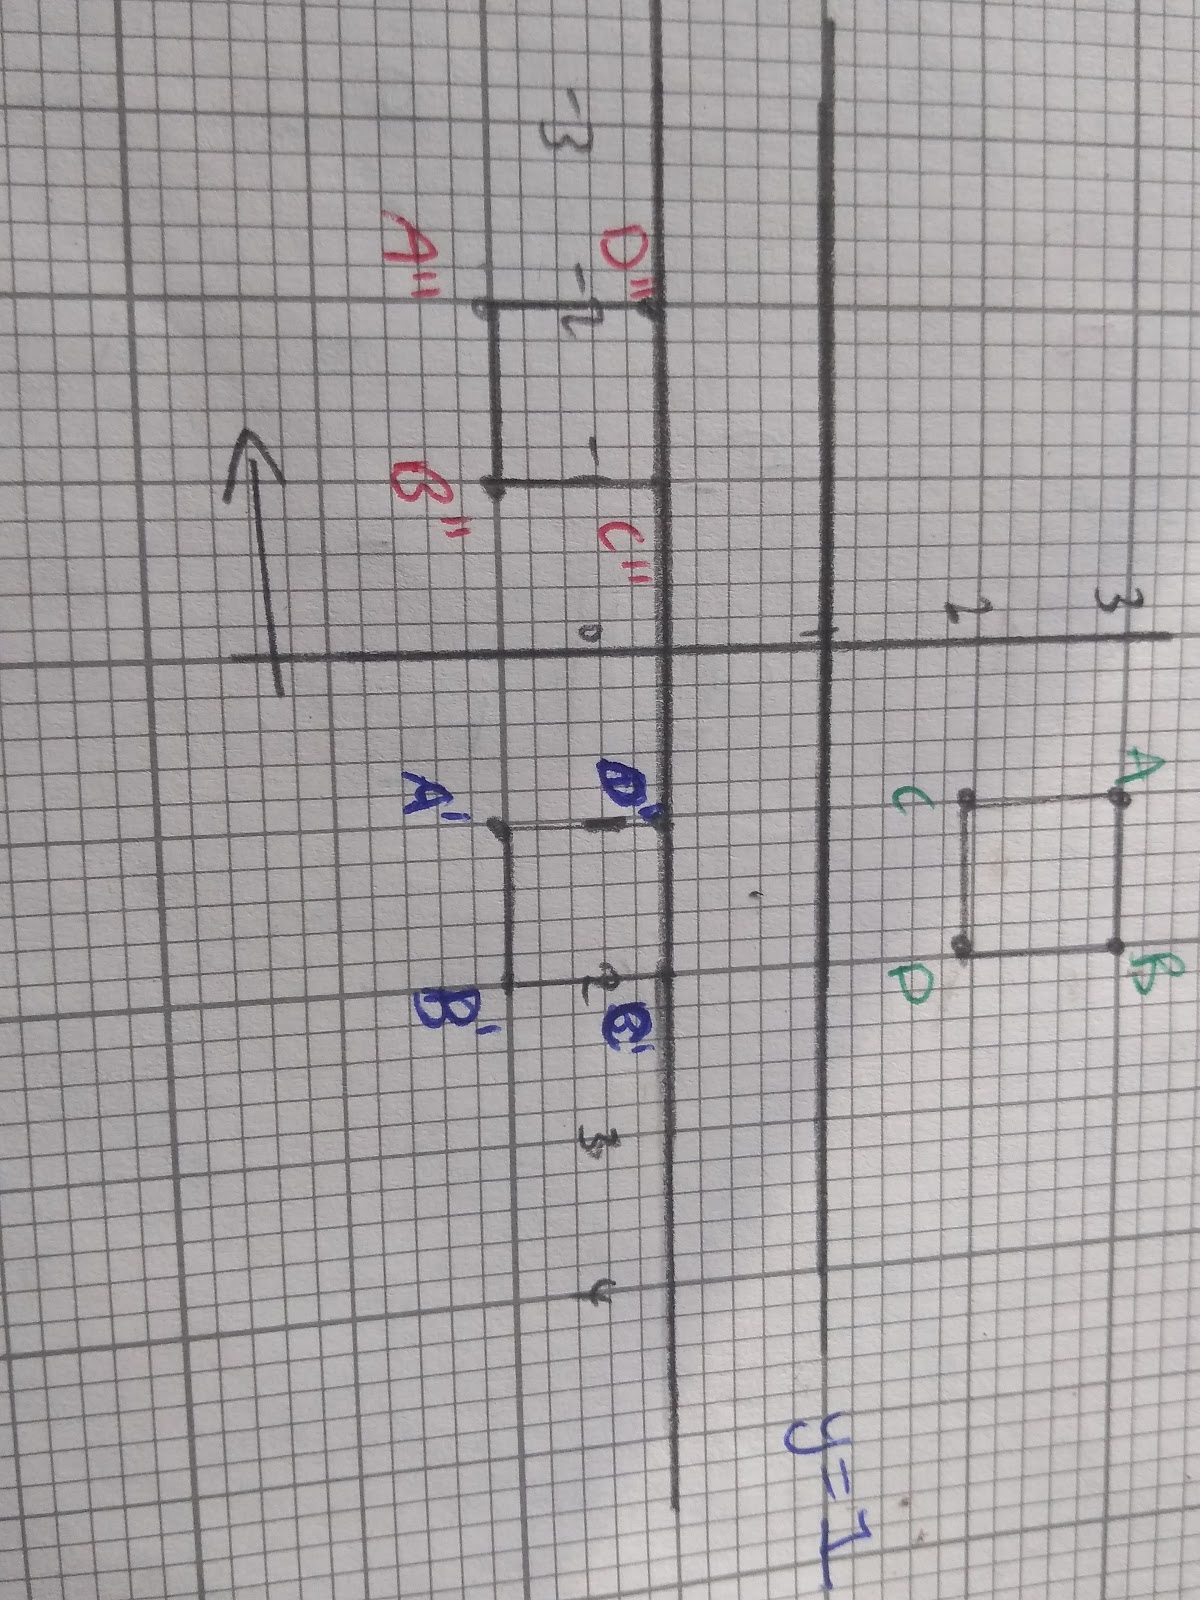
In this diagram we can see that the square, ABCD has firstly been reflected in the mirror line y=1. This has formed the blue shape A’B’C’D’ which has then been translated by the vector 
to give A’’B’’C’’D’’
This combined transformation however, could also be completed in one transformation: a reflection of ABCD in the line y=-x +1.
The only transformations that can be combined are translation, reflection and rotation.